Introduction to Cheesy Garlic Breadsticks
What Makes Cheesy Garlic Breadsticks Irresistible?
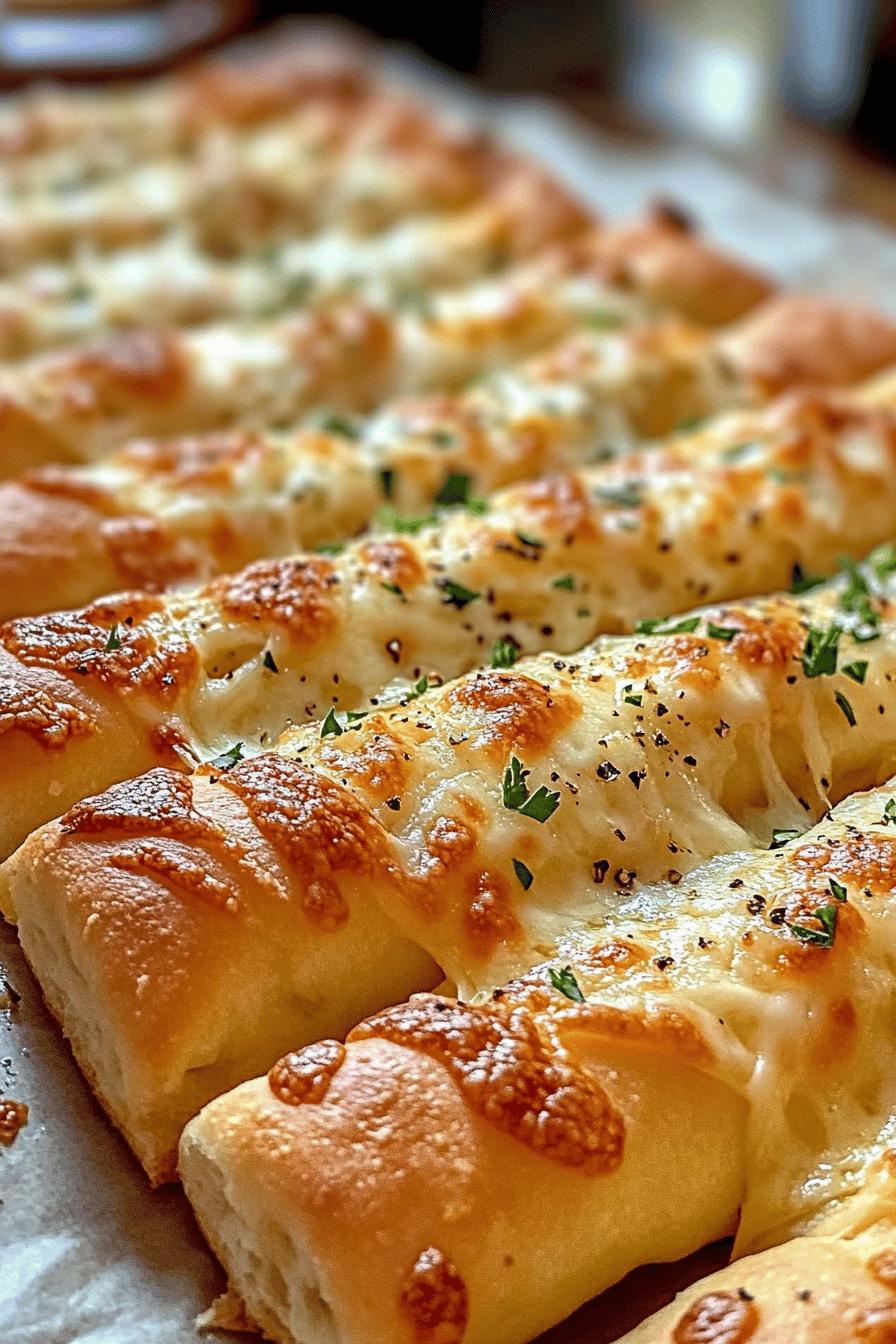
Cheesy Garlic Breadsticks are a delightful treat that combines the best of both worlds: cheese and garlic. The moment you take a bite, you’ll experience a burst of flavors. The crispy exterior gives way to a soft, chewy inside, making each bite a joy. The rich aroma of garlic mingles with the melted mozzarella and parmesan, creating an irresistible scent that fills your kitchen. Plus, they are incredibly easy to make, which means you can whip them up anytime you have a craving!
The Perfect Snack or Appetizer
Whether you’re hosting a party or just enjoying a cozy night in, Cheesy Garlic Breadsticks are the perfect addition to any meal. They serve as a fantastic appetizer that can get everyone excited about the main course. You can also enjoy them as a snack while watching your favorite movie or game. Their versatility makes them a go-to choice for any occasion. Plus, they pair wonderfully with marinara sauce, adding an extra layer of flavor that everyone loves!
Ingredients for Cheesy Garlic Breadsticks
To create these mouthwatering Cheesy Garlic Breadsticks, you’ll need a few simple ingredients. Each one plays a vital role in delivering that cheesy, garlicky goodness. Here’s what you’ll need:
- 1 cup warm water (about 110°F or 43°C) – This helps activate the yeast.
- 2 teaspoons sugar – A little sweetness to help the yeast rise.
- 2 ¼ teaspoons active dry yeast – The key ingredient for fluffy breadsticks.
- 2 ½ to 3 cups all-purpose flour – This forms the base of your dough.
- 1 teaspoon salt – Enhances the flavor of the breadsticks.
- 2 tablespoons olive oil – Adds richness and helps with texture.
- 3 cloves garlic (minced) – The star flavor that makes these breadsticks irresistible.
- 1 cup shredded mozzarella cheese – For that gooey, cheesy topping.
- ½ cup grated parmesan cheese – Adds a sharp, nutty flavor.
- 1 tablespoon dried Italian herbs (optional) – For an extra burst of flavor.
Gather these ingredients, and you’re ready to start making your Cheesy Garlic Breadsticks. The combination of warm, fresh bread with melted cheese and garlic will surely make your taste buds dance with joy!
Step-by-Step Preparation of Cheesy Garlic Breadsticks
Step 1: Preparing the Dough
To start, you need to prepare the dough for your Cheesy Garlic Breadsticks. Begin by combining the warm water and sugar in a large mixing bowl. Stir gently until the sugar dissolves. Next, sprinkle the active dry yeast over the water and let it sit for about 5 to 10 minutes. You’ll know it’s ready when it becomes frothy. This means the yeast is activated and ready to work its magic!
Once the yeast is frothy, add 2 ½ cups of all-purpose flour, salt, and olive oil to the bowl. Mix everything together until a dough begins to form. If the dough feels too sticky, gradually add more flour, a little at a time, until it’s manageable. Knead the dough on a floured surface for about 5 minutes. You want it to be smooth and elastic. After kneading, place the dough in a greased bowl, cover it with a clean kitchen towel, and let it rise in a warm place for about 1 hour or until it doubles in size.
Step 2: Adding the Garlic and Cheese Mixture
While the dough is rising, it’s time to prepare the garlic and cheese mixture. In a small bowl, combine the minced garlic, shredded mozzarella cheese, grated parmesan cheese, and dried Italian herbs if you’re using them. Mix everything well to ensure the flavors blend together. This cheesy garlic mixture will be the star of your breadsticks, so make sure it’s evenly combined!
Once the dough has risen, punch it down gently to release the air. Then, roll it out on a floured surface into a rectangle, about ½ inch thick. Spread the garlic and cheese mixture evenly over the dough, leaving a small border around the edges. This will help keep the cheesy goodness inside when you roll it up!
Step 3: Shaping the Breadsticks
Now comes the fun part—shaping your Cheesy Garlic Breadsticks! Starting from one long side of the rectangle, carefully roll the dough tightly into a log. Pinch the edges to seal it well. Once you have your log, cut it into equal pieces, about 1 inch wide. You can use a sharp knife or a pizza cutter for this step. Place the cut pieces on a baking sheet lined with parchment paper, leaving some space between each one to allow for rising.
After shaping, cover the breadsticks with a towel again and let them rise for another 30 minutes. This second rise will make them fluffy and light!
Step 4: Baking the Cheesy Garlic Breadsticks
Preheat your oven to 375°F (190°C) while the breadsticks are rising. Once they have puffed up nicely, it’s time to bake! Place the baking sheet in the oven and bake for about 15 to 20 minutes, or until the breadsticks are golden brown and the cheese is bubbly. The aroma of garlic and cheese will fill your kitchen, making it hard to wait!
Once baked, remove them from the oven and let them cool for a few minutes. Serve your Cheesy Garlic Breadsticks warm, and don’t forget to have marinara sauce on the side for dipping. Enjoy this cheesy delight with family and friends!
Variations of Cheesy Garlic Breadsticks
Adding Herbs and Spices
One of the best things about Cheesy Garlic Breadsticks is how easy it is to customize them. Adding herbs and spices can elevate the flavor profile and make them even more delicious. For instance, you can sprinkle some dried oregano or basil into the garlic and cheese mixture. This will give your breadsticks an Italian twist that pairs perfectly with the garlic.
If you’re feeling adventurous, try adding a pinch of red pepper flakes for a spicy kick. You can also experiment with fresh herbs like parsley or chives. Just chop them finely and mix them into the cheese blend. These additions not only enhance the taste but also add a pop of color to your breadsticks!
Different Cheese Combinations
While mozzarella and parmesan are classic choices, you can mix things up with different cheese combinations. For a sharper flavor, consider adding cheddar cheese or gouda. These cheeses melt beautifully and add a unique taste to your breadsticks. You can even use a blend of cheeses for a more complex flavor.
Another fun option is to incorporate cream cheese into the mixture. This will make your breadsticks extra creamy and rich. Just remember to adjust the amount of garlic to balance the flavors. With so many cheese options available, you can create a new version of Cheesy Garlic Breadsticks every time you make them!
Cooking Note for Cheesy Garlic Breadsticks
When making Cheesy Garlic Breadsticks, a few cooking notes can help ensure your breadsticks turn out perfectly every time. First, pay attention to the temperature of your ingredients. Using warm water is crucial for activating the yeast. If the water is too hot, it can kill the yeast, preventing your dough from rising. Aim for a temperature around 110°F (43°C) for the best results.
Next, kneading the dough is an essential step. Knead it until it becomes smooth and elastic. This process develops the gluten, which gives your breadsticks their delightful texture. If you find the dough too sticky, don’t hesitate to add a little more flour, but be careful not to overdo it. Too much flour can lead to dense breadsticks.
Another important note is to allow the dough to rise in a warm, draft-free area. This helps the yeast work effectively, resulting in fluffy breadsticks. If your kitchen is cool, you can place the dough in an oven that’s turned off but has the light on. The gentle warmth will encourage the dough to rise nicely.
Lastly, keep an eye on the baking time. Ovens can vary, so check your breadsticks a few minutes before the suggested time. You want them to be golden brown and the cheese to be bubbly. If they start to brown too quickly, you can cover them loosely with aluminum foil to prevent burning.
By following these cooking notes, you’ll be well on your way to creating delicious Cheesy Garlic Breadsticks that everyone will love!
Serving Suggestions for Cheesy Garlic Breadsticks
Best Dipping Sauces
When it comes to serving Cheesy Garlic Breadsticks, the right dipping sauce can take your experience to the next level. Marinara sauce is a classic choice, offering a tangy contrast to the rich cheese and garlic. Simply warm it up and serve it alongside your breadsticks for a delightful pairing.
If you want to try something different, consider garlic butter. Melt some butter and mix in minced garlic and a sprinkle of parsley. This buttery dip enhances the garlic flavor and adds a luxurious touch. For those who enjoy a bit of heat, a spicy ranch dressing can be a fun option. The creaminess of the ranch combined with a kick of spice creates a unique flavor that complements the breadsticks beautifully.
Another great option is a creamy cheese dip. You can make a simple cheese sauce by melting cream cheese with shredded cheddar and a splash of milk. This dip is rich and cheesy, making it a perfect match for your Cheesy Garlic Breadsticks. No matter which sauce you choose, your guests will love dipping and savoring every bite!
Pairing with Meals
Cheesy Garlic Breadsticks are incredibly versatile and can be paired with a variety of meals. They make an excellent side dish for pasta dishes, such as spaghetti or fettuccine alfredo. The cheesy goodness of the breadsticks complements the flavors of the pasta, creating a satisfying meal.
For a lighter option, serve them alongside a fresh salad. The crunch of the salad balances the richness of the breadsticks, making for a well-rounded meal. You can also pair them with soups, especially tomato soup or minestrone. The warm, cheesy breadsticks are perfect for dipping into the comforting broth.
If you’re hosting a gathering, consider serving Cheesy Garlic Breadsticks as part of a charcuterie board. They can add a delightful touch alongside cured meats, cheeses, and olives. This way, your guests can enjoy them as a snack while mingling. No matter how you choose to serve them, these breadsticks are sure to be a hit!
Tips for Perfect Cheesy Garlic Breadsticks
Storing Leftovers
After enjoying your delicious Cheesy Garlic Breadsticks, you might have some leftovers. Storing them properly will help maintain their flavor and texture. First, let the breadsticks cool completely at room temperature. Once cooled, place them in an airtight container. This will keep them fresh and prevent them from becoming stale.
If you want to keep them for a longer time, consider freezing them. Wrap each breadstick tightly in plastic wrap, then place them in a freezer-safe bag. This way, they can last up to three months in the freezer. When you’re ready to enjoy them again, simply thaw them in the refrigerator overnight before reheating.
Reheating Tips
Reheating your Cheesy Garlic Breadsticks properly is key to enjoying them just as much as when they were fresh. The best way to reheat them is in the oven. Preheat your oven to 350°F (175°C). Place the breadsticks on a baking sheet and cover them loosely with aluminum foil. This will help keep them moist while they warm up. Bake for about 10 to 15 minutes, or until they are heated through.
If you’re in a hurry, you can also use the microwave. However, be cautious, as microwaving can make them chewy. Place the breadsticks on a microwave-safe plate and cover them with a damp paper towel. Heat them in short intervals of 15 to 20 seconds until warm. This method is quick but may not give you the same crispy texture as the oven.
By following these tips for storing and reheating, you can enjoy your Cheesy Garlic Breadsticks even after the first serving!
Breakdown of Time for Cheesy Garlic Breadsticks
Prep Time
Preparing Cheesy Garlic Breadsticks is a breeze! The prep time typically takes about 15 to 20 minutes. This includes gathering your ingredients, mixing the dough, and preparing the garlic and cheese mixture. You’ll also need to allow time for the dough to rise, which is essential for achieving that fluffy texture. So, while the hands-on time is short, the rising time is crucial for the best results!
Cooking Time
Once your dough has risen and you’ve shaped your breadsticks, the cooking time is relatively quick. Baking them in the oven takes about 15 to 20 minutes. You’ll want to keep an eye on them to ensure they turn golden brown and the cheese is bubbly. The delightful aroma will fill your kitchen, making it hard to resist diving in right away!
Total Time
In total, you can expect to spend about 1 hour and 30 minutes from start to finish. This includes the prep time, the first rise of the dough, the second rise after shaping, and the baking time. With just a little patience, you’ll have a delicious batch of Cheesy Garlic Breadsticks ready to enjoy. They’re worth every minute, and your taste buds will thank you!
Nutritional Information for Cheesy Garlic Breadsticks
Calories
When indulging in Cheesy Garlic Breadsticks, it’s good to know what you’re consuming. Each breadstick contains approximately 150 calories. This makes them a satisfying snack or appetizer without being overly heavy. If you’re watching your calorie intake, consider enjoying just one or two alongside a healthy meal.
Protein
Protein is an essential nutrient, and these Cheesy Garlic Breadsticks provide a decent amount. Each breadstick offers about 5 grams of protein. The combination of mozzarella and parmesan cheese contributes to this protein content, making them a tasty way to boost your protein intake while enjoying a delicious treat.
Sodium
While Cheesy Garlic Breadsticks are delicious, they do contain some sodium. Each breadstick has around 300 milligrams of sodium. This is something to keep in mind, especially if you’re watching your salt intake. You can reduce the sodium content by using low-sodium cheese or adjusting the amount of salt in the dough. Enjoying these breadsticks in moderation can help you savor their flavor without overdoing it on sodium.
FAQs about Cheesy Garlic Breadsticks
Can I make Cheesy Garlic Breadsticks ahead of time?
Absolutely! You can prepare Cheesy Garlic Breadsticks ahead of time. After shaping the breadsticks, cover them with plastic wrap and place them in the refrigerator. They can stay fresh for up to 24 hours. When you’re ready to bake, simply let them sit at room temperature for about 30 minutes before popping them in the oven. This way, you can enjoy warm, cheesy goodness without the last-minute rush!
What can I use instead of mozzarella cheese?
If you don’t have mozzarella cheese on hand, don’t worry! There are several great alternatives. Cheddar cheese is a popular choice, offering a sharper flavor. Gouda or provolone can also work well, providing a unique taste and excellent meltability. For a creamier texture, consider using cream cheese mixed with other cheeses. Feel free to experiment with different cheese combinations to find your favorite!
How do I make Cheesy Garlic Breadsticks gluten-free?
Making Cheesy Garlic Breadsticks gluten-free is simple! Just substitute all-purpose flour with a gluten-free flour blend. Make sure the blend contains xanthan gum, which helps mimic the elasticity of gluten. Follow the same steps in the recipe, and you’ll have delicious gluten-free breadsticks that everyone can enjoy. Just be sure to check that all other ingredients, like the cheese and seasonings, are gluten-free as well!
Can I freeze Cheesy Garlic Breadsticks?
Yes, you can freeze Cheesy Garlic Breadsticks! After baking, let them cool completely. Then, wrap each breadstick tightly in plastic wrap and place them in a freezer-safe bag. They can be stored in the freezer for up to three months. When you’re ready to enjoy them, simply thaw in the refrigerator overnight and reheat in the oven for a few minutes. This way, you can savor the cheesy goodness anytime!
Conclusion on Cheesy Garlic Breadsticks
Why You Should Try This Recipe Today
In conclusion, Cheesy Garlic Breadsticks are not just a treat; they are an experience! With their crispy exterior and gooey, cheesy interior, they are sure to please anyone who takes a bite. This recipe is simple enough for beginners yet delicious enough to impress seasoned cooks. Whether you’re preparing for a family dinner, a game night, or just a cozy evening at home, these breadsticks are the perfect addition to your table.
Moreover, the versatility of this recipe allows you to customize it to your taste. You can add your favorite herbs, try different cheese combinations, or even experiment with various dipping sauces. The possibilities are endless! Plus, with the option to make them ahead of time or freeze them for later, you can enjoy this cheesy delight whenever the craving strikes.
So, why wait? Gather your ingredients and start making your own Cheesy Garlic Breadsticks today. Your taste buds will thank you, and your friends and family will be begging for the recipe. Enjoy the warm, cheesy goodness that brings everyone together, one delicious bite at a time!
Looking to add more cheesy and garlic-infused dishes to your recipe collection? Try out these must-try recipes:
- Cheesy Garlic Zucchini Steaks: A Flavorful Delight
- Cheesy Garlic Chicken Wraps: A Quick and Tasty Meal
- Creamy Garlic Parmesan Chicken Wings: Finger-Licking Goodness
For more fantastic recipes and food inspiration, follow us on Pinterest!